Installing SSL certificate on your domain is a very crucial step while setting up a website. Like many shared hosting, with Cloudways hosting also you will get et’s Encrypt SSL Certificate for free. In this tutorial, I am going to share the step by step guide to Install Let’s Encrypt SSL Certificate On Cloudways Domain.
So far, we have learnt how to map the domain with Cloudways account and also how to install WordPress on your domain. You just check the below 3 tutorial before proceeding further.
- How To Install WordPress On Cloudways Hosting
- How To Point NameCheap Domain To Cloudways Hosting
- How To Connect Godaddy Domain To Cloudways
Now complete the website setup in Cloudways, the last thing you need to do is to install free SSL certificate on your domain name. Let’s follow the step by step guide.
How to Install Free SSL Certificate on Cloudways
As I have mentioned, you will get free SSL certificate from Let’s Encrypt like you get from any shared hosting plans. If you want to go for paid SSL certificates, then there are few other options. But as a beginner, it is good to start with Let’s Encrypt Free SSL certificate.
Why Choose Let’s Encrypt SSL
The following reasons explain why you should choose the Let’s Encrypt SSL Certificate.
- Zero Cost — Let’s Encrypt SSL Certificate is free.
- Safe — It is as secure as paid certificates because of its modern security architecture and techniques.
- Easy — It is simple and easy to install. There is no need to create any accounts elsewhere, no email validations, no payments.
- Automatic — The entire process of generating, installing, and renewing SSL certificates is done automatically.
Although there are certain limitations, but this is enough for a blogger to set up a website on Cloudways. Here are the steps to follow one by one.
Step 1: As soon as you login to your Cloudways account, navigate to the applications area and click on the application/website where you want to install SSL Certificate. You will find a screen like below and from the left side menu options, click on SSL Certificate.
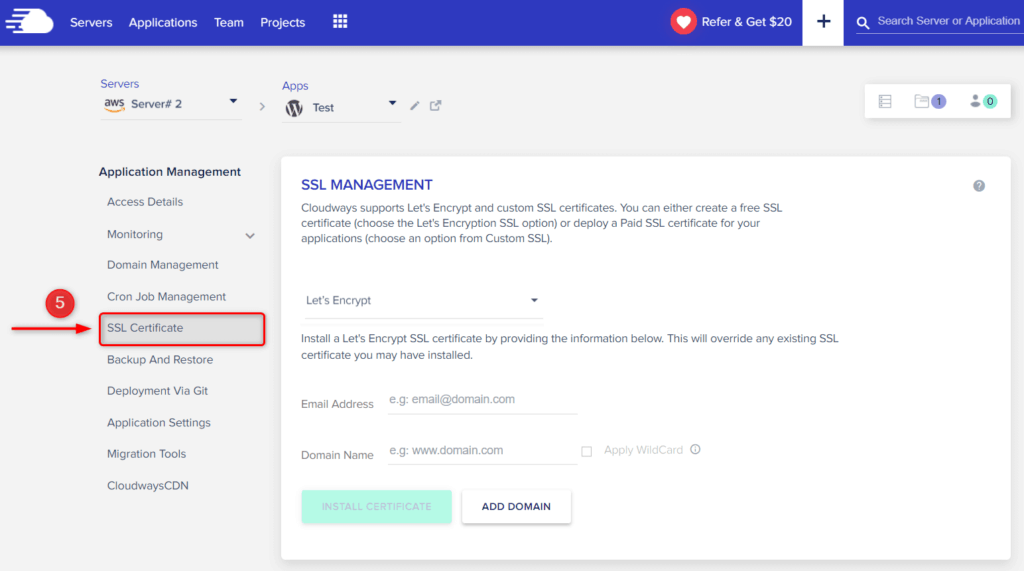
Step 2: Now Under SSL Management, select Let’s Encrypt. Next provide your email address and the domain name where you want to install SSL certificate. Now here you can provide multiple domains as well. Mostly if you have subdomains, then you can use this feature. Anyway you need to provide these information and click on the Install Certificate.
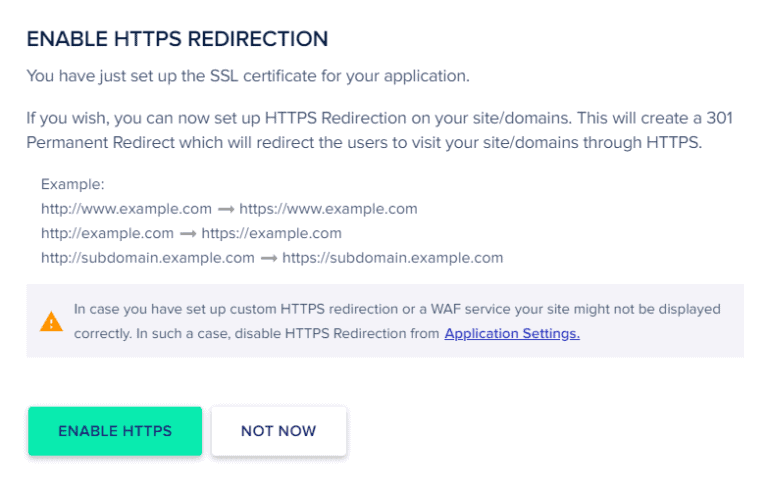
Step 3: Then it will open a new screen where you have to click on Enable HTTPS button. It may take some time, but the process will complete. Don’t refresh or change the page and let the installation complete.
That’s it
So, this is a very simple tutorial to install free let’s encrypt SSL certificate on your Cloudways domain name. Make sure you click on the Auto-Renew option as per the screen below.
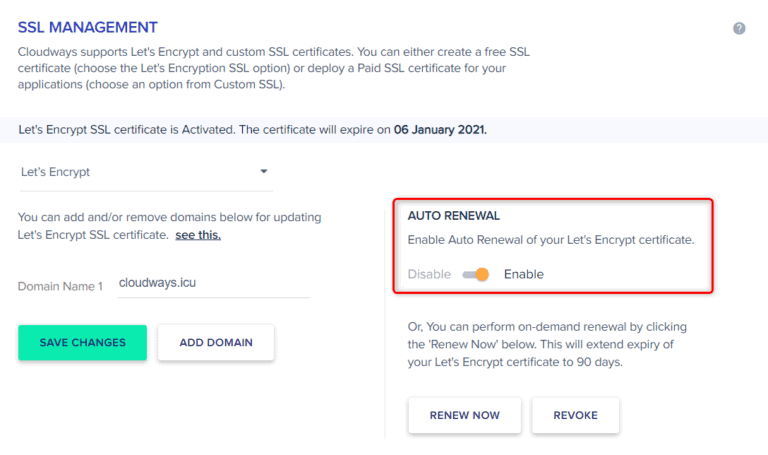
Generally Free SSL certificate needs to be renewed in every 3 months and it will be done automatically. In case you face any problem, you need to visit this place and click on Renew Now button to install SSL Certificate manually on Cloudways.