If you have decided to move your website to Cloudways hosting, this tutorial will help you to point your GoDaddy domain with Cloudways easily. If your domain is with NameCheap then you can follow this tutorial about connecting NameCheap domain with Cloudways hosting.
In this tutorial, I will be sharing the complete step by step guide to link your GoDaddy Domain with Cloudways and mention all important points that you need to keep in mind. Recently I have moved this website from SiteGround To Cloudways and that’s why I am able to share all these tutorials from my own experiences.
If you want to buy hosting from Cloudways, then you can use this link and also apply Coupon Code BLOGGINGJOY to get 10% discount on first 3 months hosting bill. On top of that I will also provide you $300 worth BONUS.
How to Point Godaddy Domain to Cloudways Hosting (5 Steps)
Generally if you have used cPanel based shared hosting so far, you will find this process completely different. But trust me, the process is very simple indeed. Just try to follow these steps carefully, if possible use Cloudwaya Promo Code to get 3 days trial account to do all experiment first before changing your actual domain.
Anyway, let’s start the process of connecting your GoDaddy domain with Cloudways account. This domain is with Godaddy only.
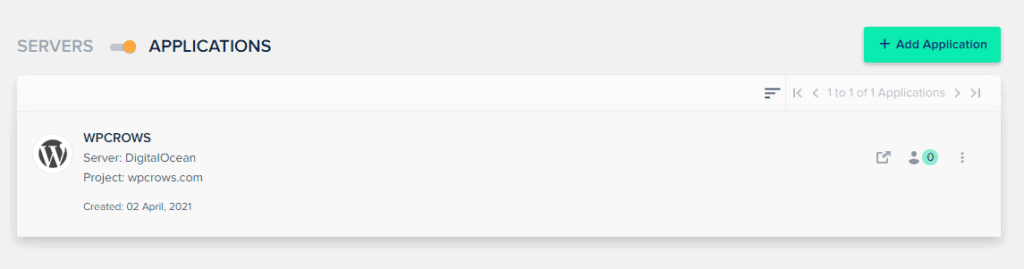
Step 1. First of all login to Cloudways account and go to your application area. I have considered that you have already created a server & then also created your first application as well.
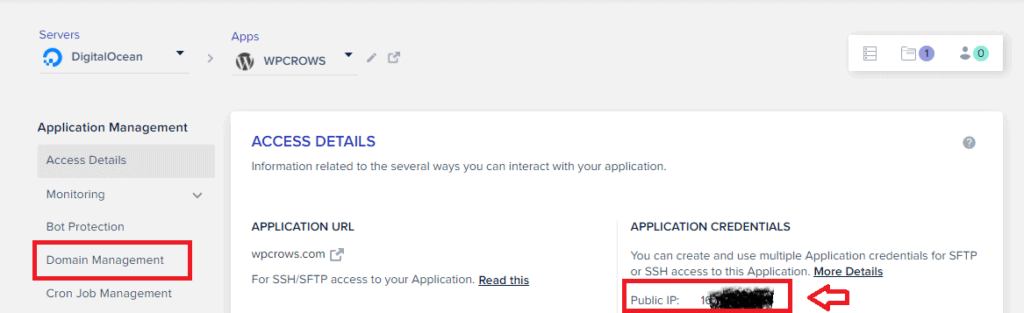
Step 2: Next click on the application and check the below screen carefully. In the below image right side you will find the IP address, we need this address to connect the domain with Cloudways. After that we also need to go to Domain Management from the left side menu option, later on.
Step 3: Now login to your GoDaddy account and visit the DNS area of your domain name. In case your domain has DNS of any other hosting, you will not be able to edit the DNS records.
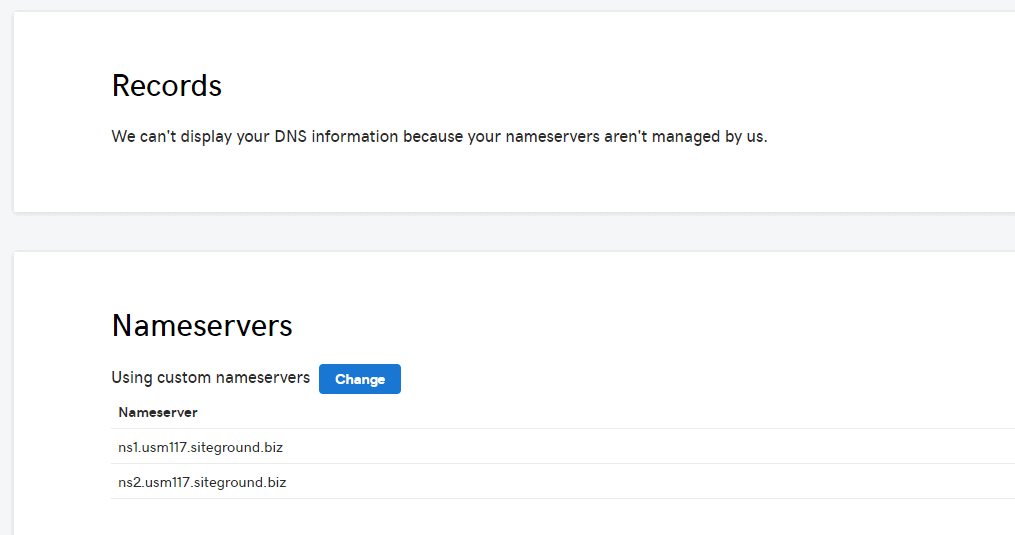
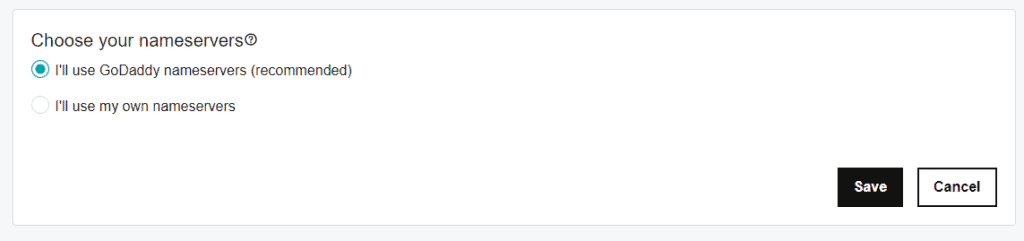
E.g. my domain was initially with SiteGround, so I found a screen like below. You need to edit the DNS records and choose the first option, GoDaddy DNS.
Then you will be able to see a screen like below. In case it is not coming, just refresh the screen few times. Now here we need to do some changes in next step.
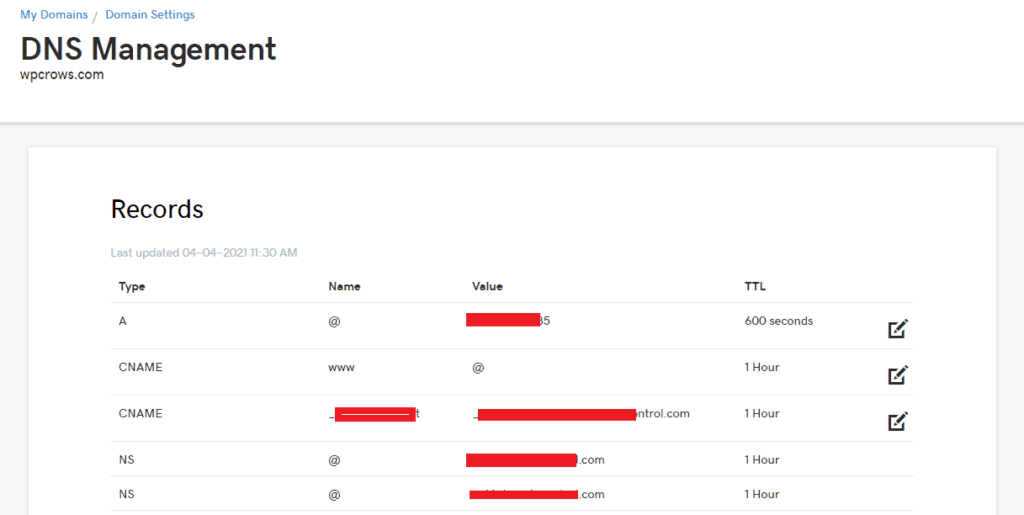
Step 4: Now here you need to change the A record of your domain. Right side there is an EDIT icon just click on that. You just need to edit this entry as it will be there by default. If that is not available, then you have to add one A record with below data.
- Type: A
- Name: @
- Value: IP Address (here we will copy the IP address of our Cloudways Application and paste here)
- TTL: Leave it as it was
That’s it. You have to save the entry.
Note
In many tutorials I found people are asking to change the CNAME record as well where Name = WWW. I tried the same to change the @ value with the domain name. But it didn’t update or change anything. I kept it as it was and later on migrated my website from SiteGround To Cloudways like that only. Didn’t find any problem though.
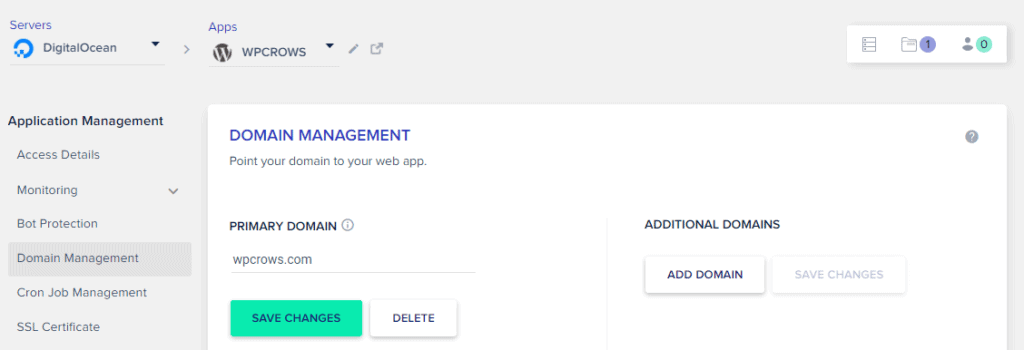
Step 5: In next step you need to go to your Cloudways account => Application => Click on Domain Management. You will find the temporary domain name. Here you need to add your domain name and click on save.
It will take some time, before your domain start getting linked. Next we have to install SSL certificate as well that I will cover in the next tutorial.
That’s it
So, that’s it in this Cloudways tutorial where I have explained how to connect your Godaddy domain name with Cloudways hosting account. Due to DNS propagation, it may take max 24 hours time.
But generally in few hours you will find changes will start reflecting. In fact in my case in 20-25 minutes I found domain is linked with Cloudways. But still for the safe side, you can wait for some more time before start installing WordPress on that domain. If you find this tutorial useful, feel free to share this article. If you have any doubt, please share your questions below.