In the last tutorial, I shared how you can point the GoDaddy domain with Cloudways, and now, in this tutorial, I am going to share how you can link your NameCheap Domain with a Cloudways Hosting account.
Both processes are technically the same, but the only difference is the interface. GoDaddy & NameCheap are very popular domain registrars. I have purchased most of my domains from GoDaddy only. But later on, I realized NameCheap is comparatively better.
With NameCheap, you will get a good initial discount, and free WhoisGuard, which is a very good feature. And while renewing your domain, you will get a discount. So I would recommend you to check out NameCheap if you have a plan to buy a new domain name.
5 Best WordPress Hosting Services (JUNE 2023)
Very beginner-friendly. Can be a good option if this is your first WordPress site. | ||
Very cheap. This is one of the cheapest WordPress hosts that you’ll find. | ||
 | Good performance for the money. Use the LiteSpeed-powered Turbo plans for best results. | |
Good performance via LiteSpeed. Also has a focus on being environmentally friendly. | ||
 | Good performance for the money. Not recommended for total beginners, though. |
How To Connect NameCheap Domain to Cloudways Hosting (5 Steps)
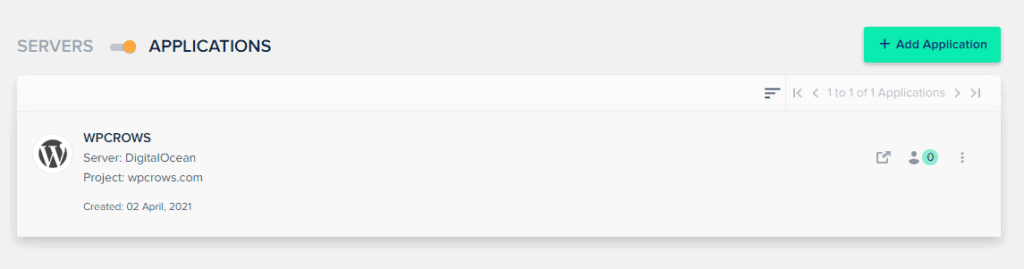
So, like the previous tutorial, you have to log in to your Cloudways account and then click on Applications so that you can follow the below tutorial.
Step 1. I have added only this website so far on this Digital Ocean server of Cloudways with 1 GB RAM, 25 GB Disk space, etc, which looks good for 1 website for me at a price of $10/mo. I am quite impressed with the website speed. Anyway, let’s continue with this Cloudways NameCheap tutorial.
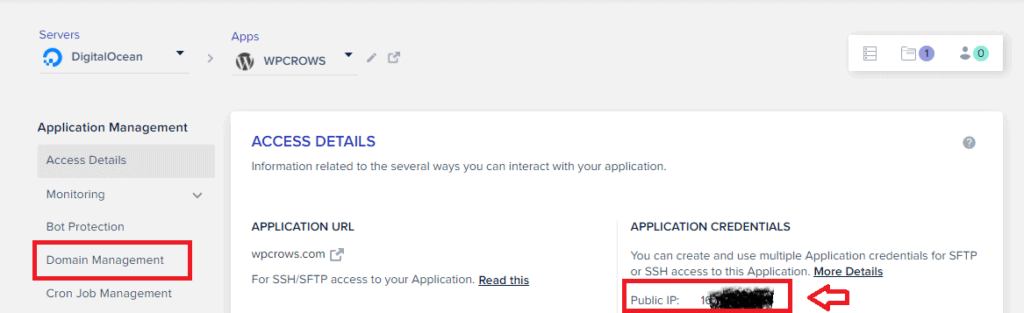
Step 2: Next, click on the application and check the below screen carefully. In the below image right side, you will find the IP address, we need this address to connect the domain with Cloudways. After that, we also need to go to Domain Management from the left-side menu option later on.
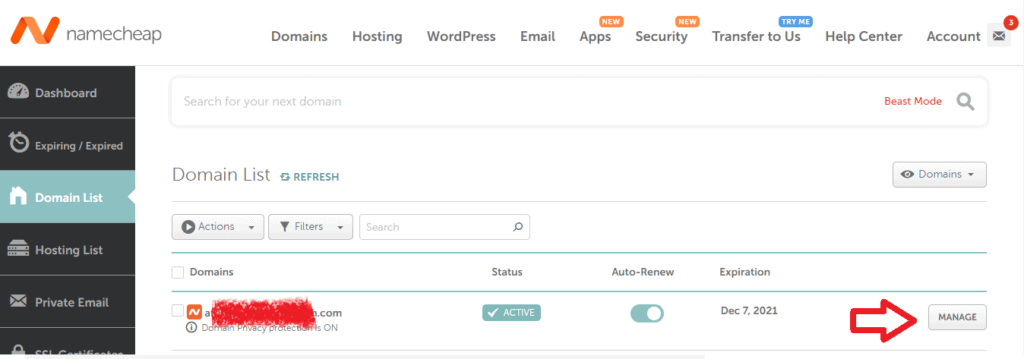
Step 3: Now log in to your NameCheap account. NameCheap dashboard will look like below, and against every domain, you will find a manage button.
Click on that button, and you will find the screen below.
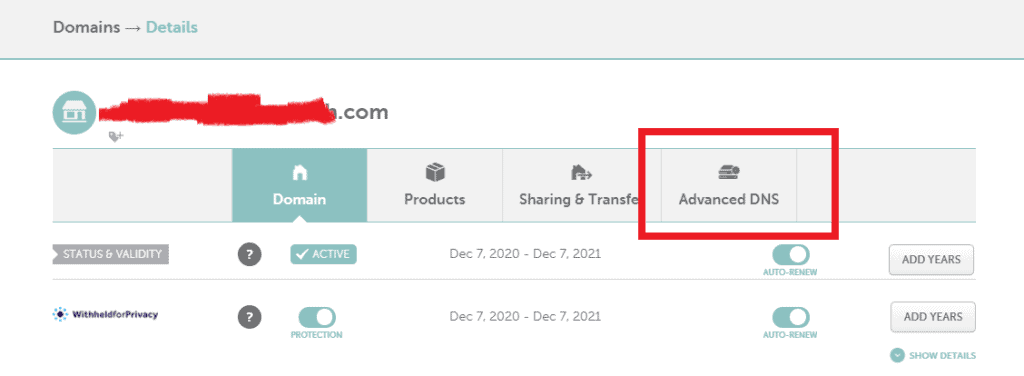
Click on the Advanced DNS option there you will find a screen like the one below.

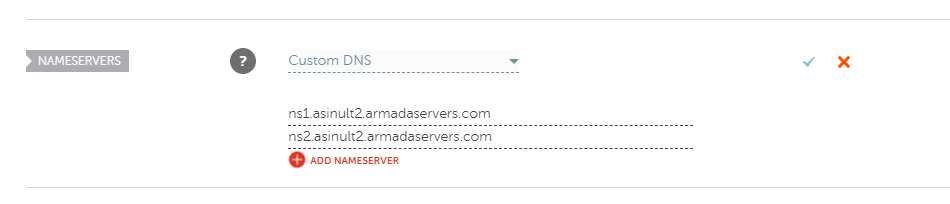
Now, as this domain is already linked with another hosting account, you will find a screen like the above. You have to change the DNS settings to NameCheap Basic DNS settings to edit it further. So, click on the option Change DNS Type.
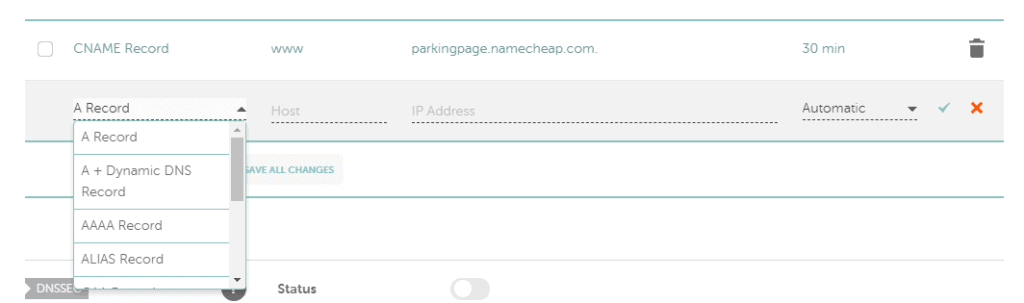
It will take you to this screen again. Here from the drop-down of Custom DNS, choose Basic DNS and then save the changes. If you have purchased a NameCheap domain and first time connecting to Cloudways, you don’t need to do this step. You will get a screen like the one below where you can directly add an A record and a CNAME record.
Step 4: Now, here, you need to change/ADD the A record of your domain. You just need to edit this entry, which will be there by default. If that is not available, then you have to add one A record with the below data.
- Type: A
- Name: @
- Value: IP Address (here we will copy the IP address of our Cloudways Application and paste here)
- TTL: Leave it as it was
That’s it. You have to save the entry by clicking the TICK icon in the right side.
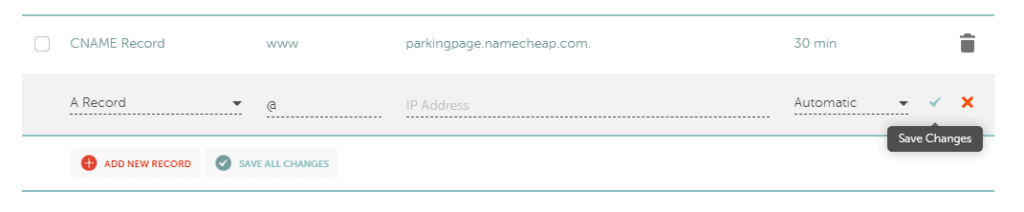
Similarly, you have to create a CNAME record as well. Unlike GoDaddy Domain, I was able to change the CNAME records with the domain name like below.

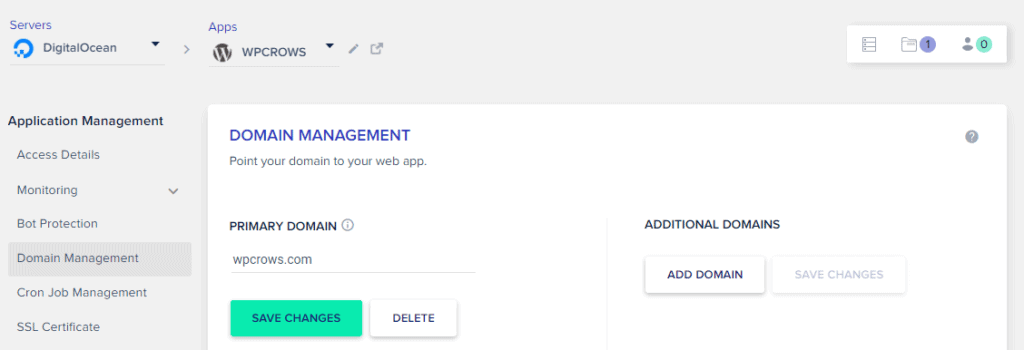
Step 5: In the next step, you need to go to your Cloudways account => Application => Click on Domain Management. You will find the temporary domain name. Here you need to add your domain name and click on save.
It will take some time before your domain start getting linked. Next, we have to install an SSL certificate as well, which I will cover in the next tutorial.
That’s it
So, that’s it in this tutorial, where I have explained how to connect your NameCheap domain name with a Cloudways hosting account. Due to DNS propagation, it may take max 24 hours time, but it is generally done in the next 20-30 minutes. If you find this tutorial useful, feel free to share this article. If you have any doubts, please share your questions below by writing a comment below.