Want to change your hosting from SiteGround To GreenGeeks? Then I will help you execute this complete process of transferring your website from SiteGround To GreenGeeks manually without downtime.
SiteGround is one of the best WordPress hosting providers. Still, recently, due to changes in their pricing structure, people have started dropping out of their services and gradually Transfer A Website From SiteGround To GreenGeeks in 2024. When you buy hosting from a good company, the cost of hosting is a significant factor.
When SiteGround’s competitors offer all such features and services at lower prices, people will be forced to decide to migrate their websites from SiteGround to other hosting companies. As a new GreenGeek user, you will get a massive GreenGeeks Discount on their WordPress hosting plans.
In this guide, I will talk about explicitly moving to GreenGeeks hosting and answer all your questions:
- How To Move Web Hosting From SiteGround to GreenGeeks
- How do I transfer from SiteGround to GreenGeeks?
- How To Transfer Your Website From SiteGround To GreenGeeks?
- How to migrate a WordPress site to GreenGeeks Hosting
Table of Contents
Why Migrate Your Website From SiteGround To GreenGeeks?
If you are unaware, SiteGround has recently increased its web hosting price. And it’s quite significant. Here is the new SiteGround Pricing: The SiteGround StartUp cost will increase from $3.95 to $6.95, the GrowBig plan from $5.95 to $9.99, and the GoGeek Plan from $11.95 to $14.99 per month.
In such a situation, SiteGround is not at all a beginner-friendly cheap WordPress hosting provider. Their StartUP plan is costly and has very limited features, which is not worth it. I am writing this article for those who want to transfer their website to an affordable and reliable hosting provider like GreenGeeks.
GreenGeeks Vs. SiteGround Pricing Comparison
Now, let me share an interesting comparison. I will show you that the SiteGround StartUp plan is way more costly than the GreenGeeks PRO Plan and also lacks many premium features.
GreenGeeks Pro Plan
- Price is $4.95/mo after initial discount (3 Yrs)
- Unlimited Websites
- Unlimited Web Space
- Unmetered Data Transfer
- Unlimited E-mail Accounts
- Faster Performance
- Free SSL Certificate
- Free Domain Name for 1st Year
- Free Nightly Backup
- Free CDN
SiteGround Startup
- Starting Price $6.99/mo with 53% discount
- No Free Domain
- Renewal Price $14.99
- 10 GB Space
- 10,000 visits/mo Traffic Limit
- Only 1 website
- No Domain Privacy
- Only automatic Backup, no On-Demand Backup
How To Buy Hosting From GreenGeeks With the Best Discount?
So, if you have decided to migrate your website from SiteGround To GreenGeeks, you need to buy hosting from GreenGeeks. GreenGeeks is one of the most popular green web hosting providers and one of the best SiteGround alternatives. They offer cheap and affordable hosting with premium features like Free SSL Certificates and free Domain names.
Step 1: Use This link to visit GreenGeek’s Official website. This link will activate the Special GreenGeeks Pricing $2.49/mo. The actual price is $10.95/mo, but by using this unique GreenGeeks promo code, you can save up to 70%.

Step 2: GreenGeeks offers three different hosting plans under the shared WordPress hosting category. You’ll see a Lite, Pro, and Premium in the below picture. If you have confusion which plan to choose, then check out this Best GreenGeeks plan guide where I have explained why GreenGeeks PRO plan is the best for bloggers.
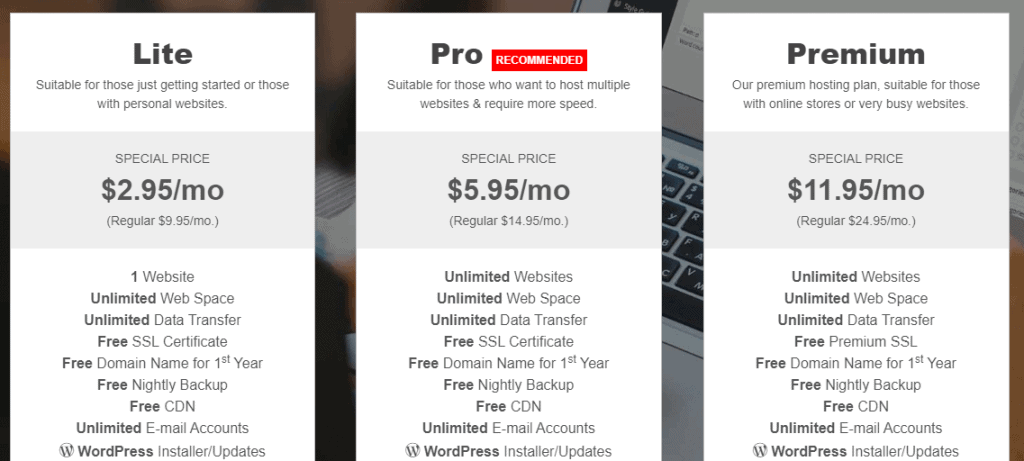
- EcoSite LITE: Perfect for small websites or blogs just starting.
- EcoSite PRO: Great for growing websites that need more speed and resources.
- EcoSite PREMIUM: Our small business plan is perfect for busy websites or online stores.
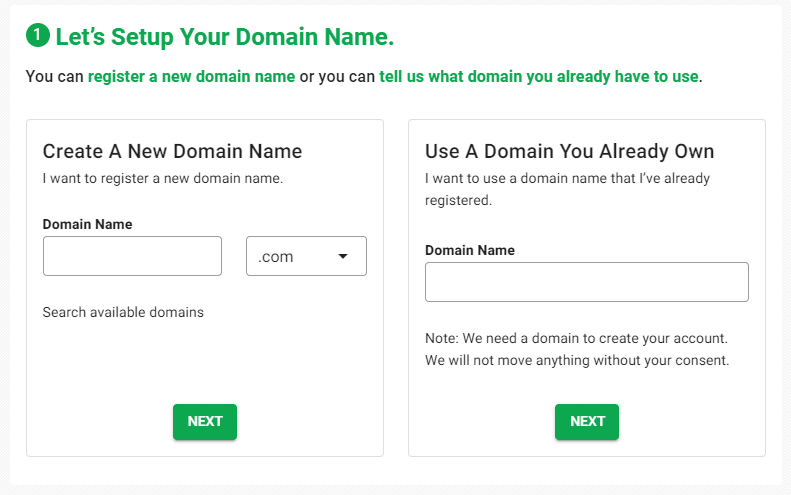
Step 3: Next, click on the Get Started button and go to the next screen, where you must choose a domain name. With GreenGeeks hosting, you will get a free domain name for the first year.
Step 4: After that, you must provide all your details like email address, name, address, etc. You can choose the server location or data centers as well.
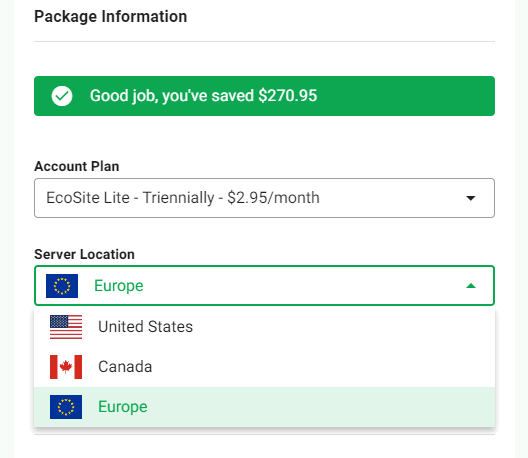
Step 5: If you choose the 36-month plan, you will save the most. The special $2.49/mo price is activated, and you can buy GreenGeeks for the next 3 years for only $89.64.
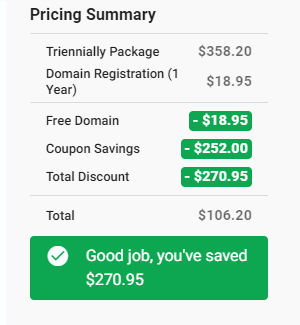
Step 6: Finally, you need to pay the amount using a credit card. You can see that you have saved 75% on GreenGeeks for the next 3 years and also get a free domain for the first year. You will only get the Credit Card payment option.
That’s it. We are done purchasing hosting from GreenGeeks. Now, let’s move your website from SiteGround To a GreenGeeks account.
How To Transfer Your Website From SiteGround To GreenGeeks in 2024?
If you are starting your blogging journey and have yet to decide on which hosting to buy, I recommend following this guide to create a blog from scratch on GreenGeeks.
Previously, I created a video while migrating the website WPBlogging360.com from FastComet To Bluehost with the help of the UpdraftPlus plugin. You can follow the steps to transfer your website from SiteGround To Bluehost.
As GreenGeeks doesn’t offer any free website migration service, I would say better to learn this process and manually migrate your website to GreenGeeks from SiteGround. Let’s understand the exact steps to switch from SiteGround To GreenGeeks.
Step 1: Install the UpdraftPlus Plugin (it’s free)
First, you must install the UpdraftPLUS Plugin on your website. We need to take the full-back up of the website. This is a free plugin, and I have created a detailed video. You can watch this video and learn how to back up your website.
Step 2: Download the backup files
I am sure you have watched that video and understand how to create backup files and download them individually. Just click on each file and download them on your computer. There are a total of 5 files. You have to make sure to keep them secure.
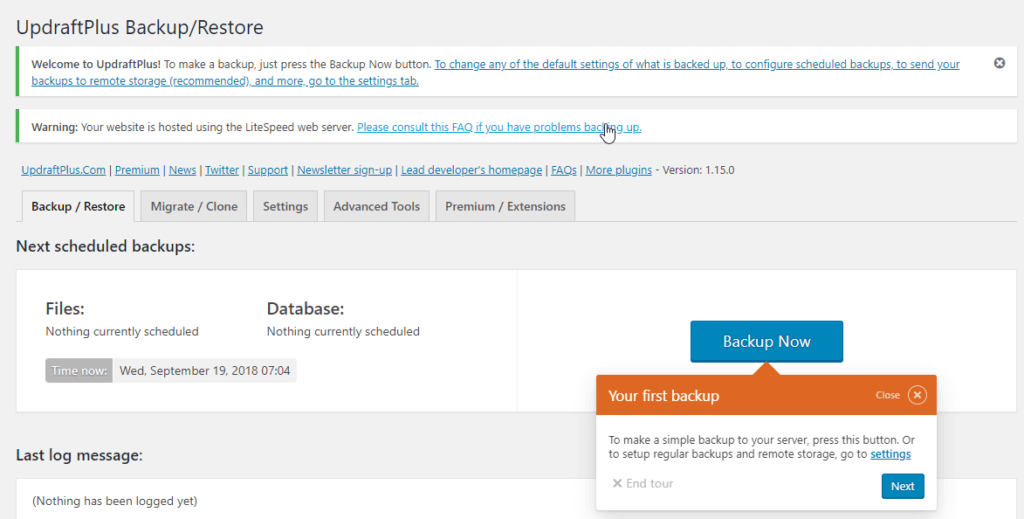
After you install that plugin, go to settings => UpdraftPlus.
Then Click on the backup now button. It will start taking backups in just a few minutes and create similar files like the ones below.

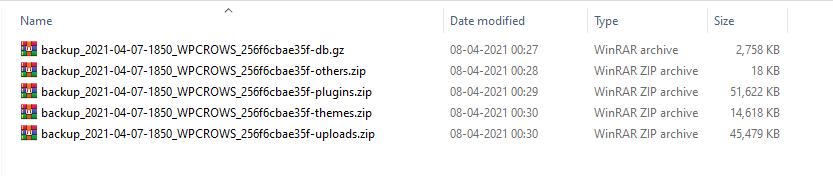
Click on each folder, such as Database, Plugins, Themes, Upload, and Others, and then download them on your desktop or laptop. This is a physical backup, and we need to keep these files safe so that we can upload them as soon as we set up our domain in our A2 Hosting account.
For example, this is how the files will look. I generally take physical backups of my websites using UpdraftPlus. You must do that even if you have a backup from the web hosting side.
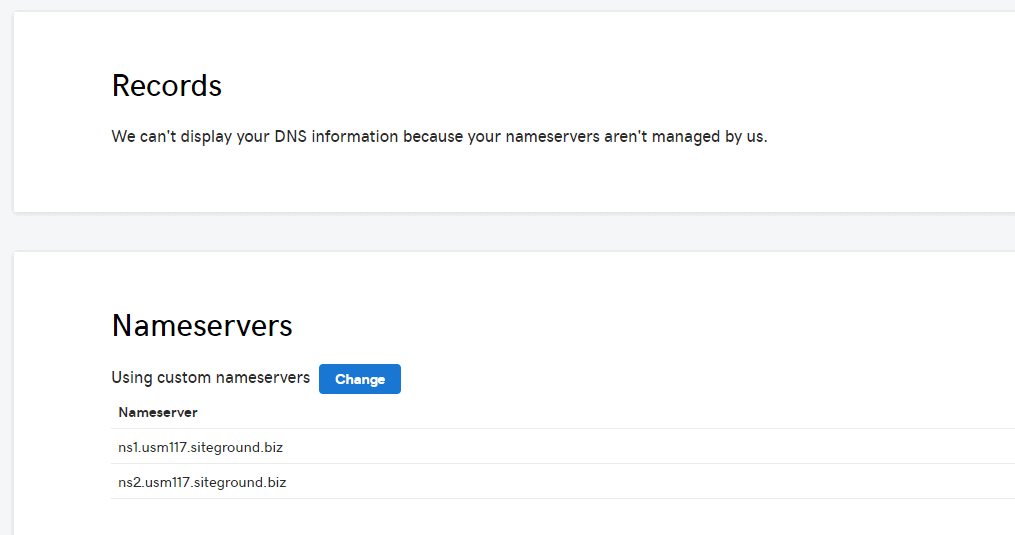
Step 3: Change the DNS records of Your Domain
So, we are done with all the work from the SiteGround side. Now we need to start transferring the website from SiteGround To Bluehost. For that, change your domain DNS records with the Bluehost Nameserver records mentioned below.
- chi-ns1.greengeeks.com
- chi-ns2.greengeeks.com
- ams-ns1.greengeeks.com
My domain is with GoDaddy, so it’s easy for me to switch hosting companies. If your domain is with SiteGround, then you have to transfer that domain from Siteground To GreenGeeks.
If you want to transfer your GoDaddy Domain to GreenGeeks for FREE, you can contact GreenGeeks and easily transfer the Domain. You need to provide the EPP Authorisation code for that. Watch the video below to find out how to get the EPP Authorisation code for the GoDaddy Domain.
They will waive the domain registration charge for the first year if you avail yourself of that offer while buying a Bluehost Share WordPress hosting plan.
Step 4: Add Domain On GreenGeeks & Install WordPress
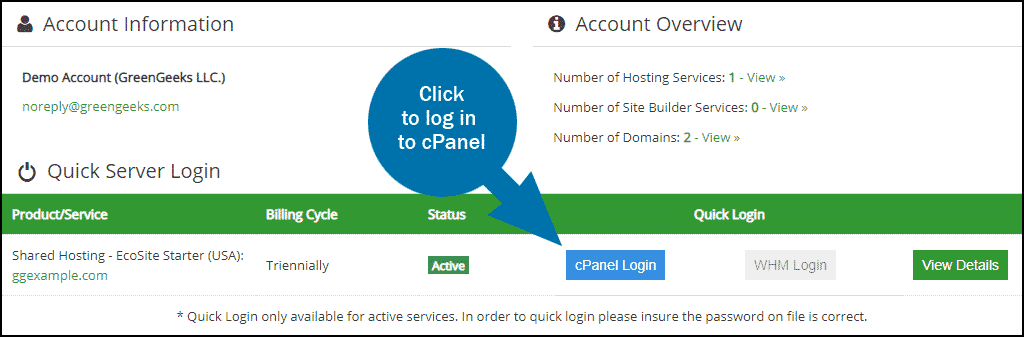
Now, you have to log in to your GreenGeeks account. For that, you need to use the URLs you received in your email after buying hosting from GreenGeeks. As soon as you log in, you will find a screen like the one below. Just click on the cPanel Login button.
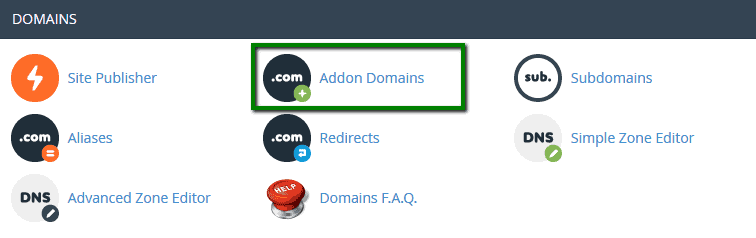
You will now find a typical cPanel interface like almost every other hosting company. Simply click on the Addon Domains option.
5. Install WordPress On The Domain On GreenGeeks
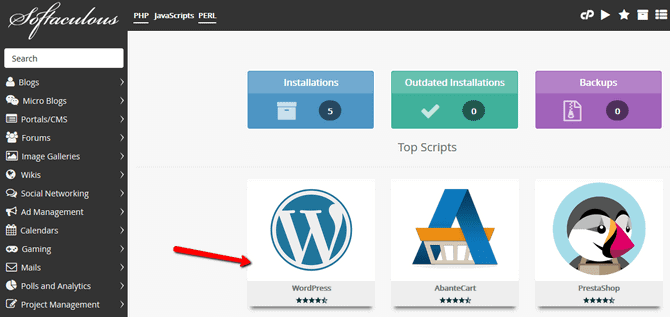
After adding the domain to your GreenGeeks account, our next target is to install WordPress on that domain. You can easily do this using Softaculuos software. Look for the software in your cPanel account.

Click on that link to open the below screen where you need to click on WordPress.
Next, to install WordPress on your domain name, you have to fill out the form below. Make sure to choose the domain name, HTTPS, website title, description, etc. Provide a user ID and password as well.
Note: Don’t put anything in the direct path. make sure to keep that empty only.
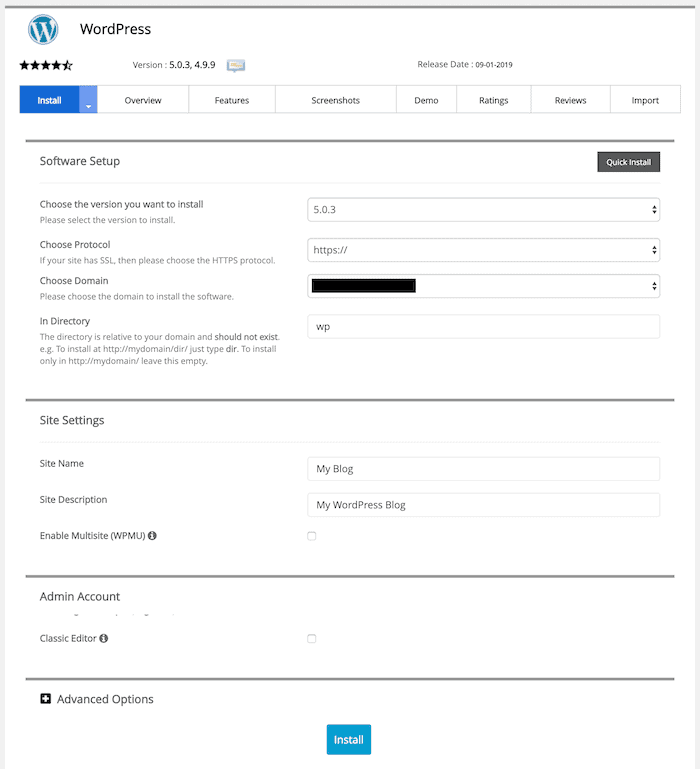
After entering all the information, you can click on the INSTALL button. Your WordPress will be installed on that domain in just a few seconds. You will then find a screen like the one below.
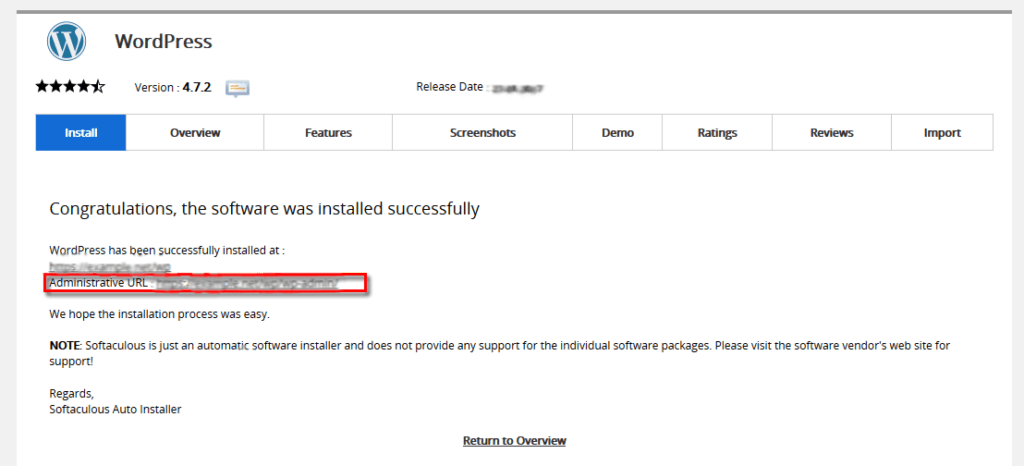
That’s it. Now Click on the Admin URL and login to the domain.
6. Install the UpdraftPlus Plugin And Restore Backup Files
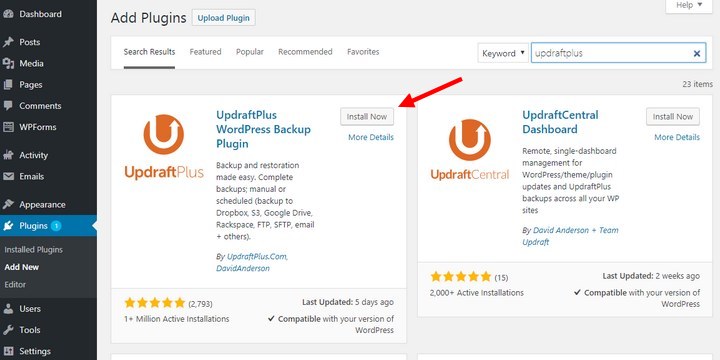
Now, we need to install the UpDraftPlus Plugin. So go to your WordPress Plugin area and click on Add New. Then search for UpdraftPlus. I am sure you are familiar with the plugin now, as we have already used the same in previous steps while taking a backup of our SiteGround website.
Then you need to go to settings=>UpdraftPlus, and you will be visiting the UpdraftPlus page. Scroll down and click on the upload backup option.
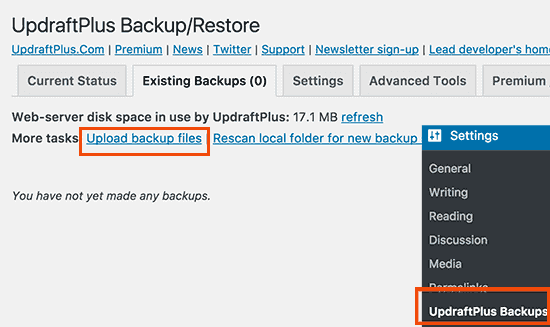
Click on that option and then choose all the downloaded ZIP files we took in previous steps. As soon as they are all uploaded, you will see a screen like the one below again.
Now you have to click on Restore button and restore will start. You will get a screen like below.
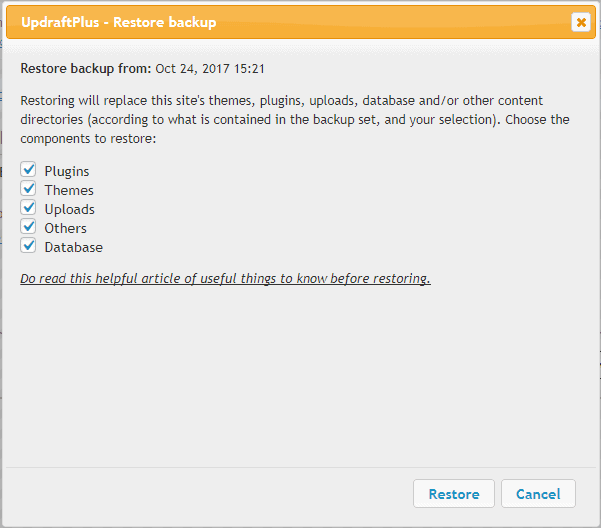
Choose everything and click on restore.
Wrapping Up
That’s it. It is actually very easy to follow, and I have done this many times with many websites. So, if you are uncomfortable, I suggest you migrate to one test website to get used to the technicalities. Regarding website downtime, it is always better to execute this process off-hours. For example, mostly at nighttime, people don’t come to your website, so accordingly, plan the migration.
You will find this website transfer tutorial from SiteGround to GreenGeeks useful. In case you have any doubts or questions, please feel free to write a comment below.