Creating online forms is essential for gathering user information, whether for contact details, feedback, registrations, or surveys. Fluent Forms is a powerful tool within WordPress that allows you to build forms effortlessly. This comprehensive guide will walk you through the process of creating a form using Fluent Forms, starting from scratch, with detailed steps and tips to enhance your form-building experience.
Table of Contents
Getting Started with Fluent Forms
Installing Fluent Forms
To kick off your form creation journey, the first step is to install Fluent Forms on your WordPress site. This can be done by visiting the WordPress plugin repository, searching for Fluent Forms, and installing it just like any other plugin. After installation, activate the plugin to integrate its capabilities into your WordPress dashboard. Fluent Forms offers a user-friendly interface that integrates seamlessly with WordPress, making it accessible even for those new to using plugins.
Creating Your First Form Using Fluent Forms
Access the Fluent Forms Dashboard
Once Fluent Forms is installed and activated, navigate to the Fluent Forms menu in your WordPress admin panel. This dashboard is where you’ll manage all your forms, view entries, and customize settings.
Initiate a New Form
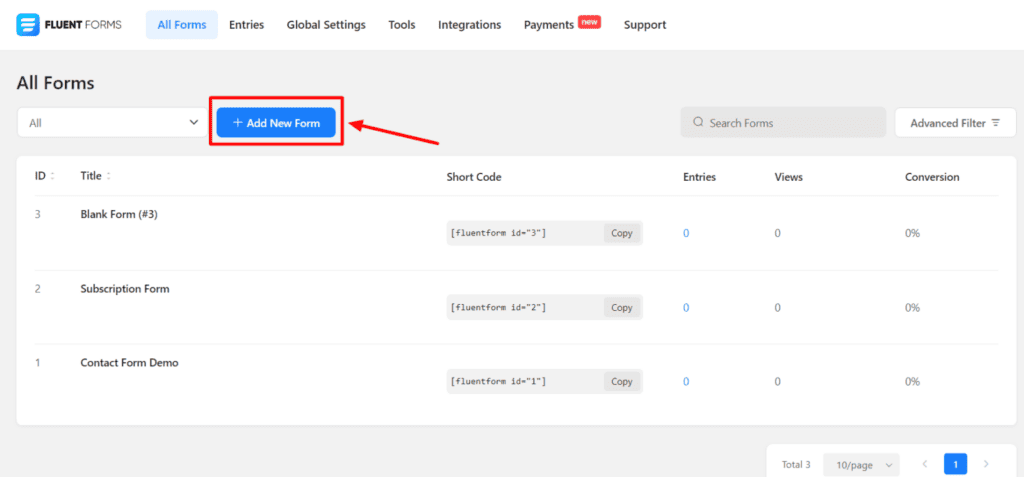
To start building a new form, click on the New Form option in the Fluent Forms menu or use the Add a New Form button located on the All Forms dashboard. This is where you can manage and edit existing forms.
Choose the Type of Form
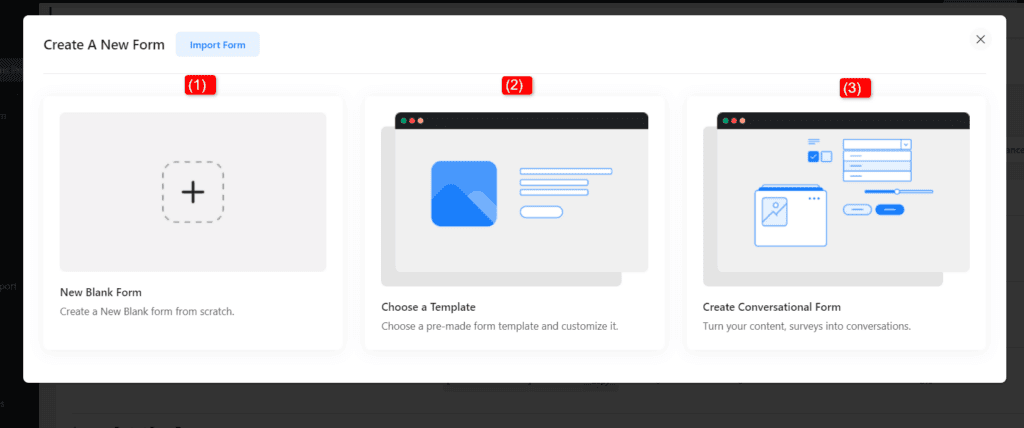
A pop-up will appear with options to select the type of form you want to create. You have several choices:
Regular Form: This option includes a variety of beautifully designed pre-built templates for common form types such as Contact Forms, Newsletter Forms, Support Forms, and more. These templates are ready to use and can be customized to suit your needs.
Premium Form: These are sophisticated templates available to users with the Fluent Forms Pro Add-On. They offer advanced features and integrations ideal for businesses looking for more functionality.
Blank Form: If you prefer to create a fully custom form, choosing a Blank Form allows you to start from scratch. This option gives you complete creative control over the form’s layout and functionalities.
Each option serves different needs and provides a base to build upon, whether you start from a template or from a blank slate.
Naming Your Form
After selecting Blank FormYou’ll need to give your form a name or any form template. This should be something descriptive that reflects its purpose, such as “Customer Feedback Form” or “Event Registration.”
Designing Your Form
Adding Fields
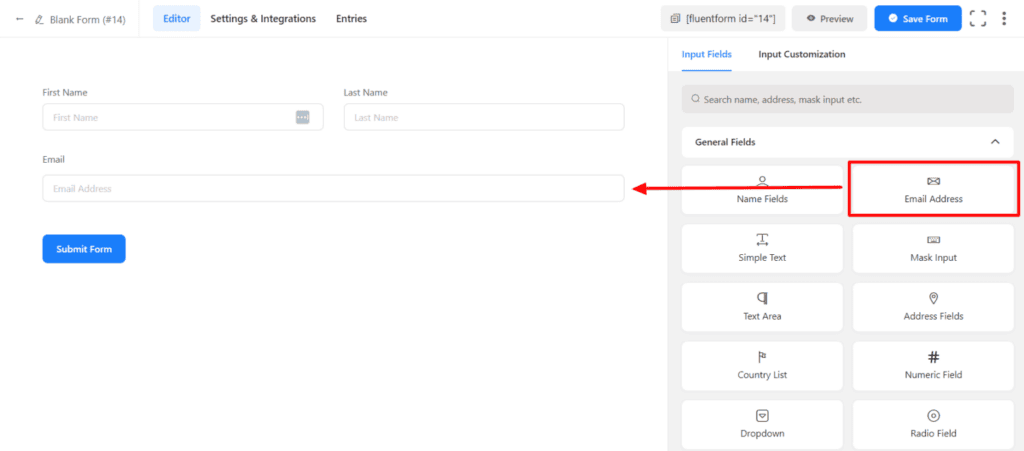
Fluent Forms offers various field types to accommodate different data inputs. These include text fields, email addresses, checkboxes, dropdown selections, file uploads, and more. You can add these to your form using the intuitive drag-and-drop editor. Drag a field from the available options and drop it into your form layout.
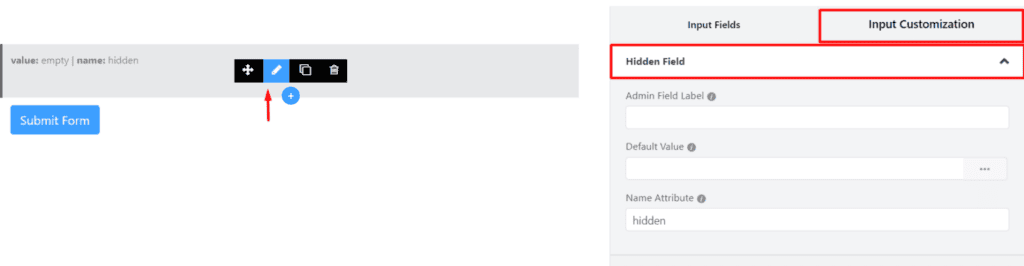
Customizing Fields
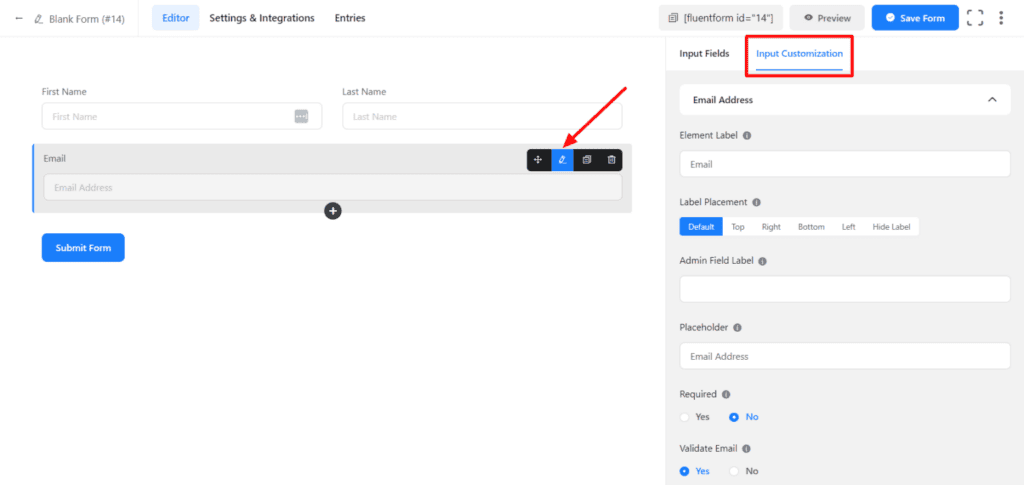
Each field can be customized to fit the specific requirements of your form. By clicking on the Edit icon when hovering over a field, you can access settings to modify its label, adjust its size, make it a required field, and configure other options like placeholder text and default values. The Input Customization tab on the right sidebar offers additional settings for further refinement, such as setting validation rules or custom CSS classes for styling.
Finalizing Your Form
Save Your Form
Once you’ve placed and customized all the necessary fields, don’t forget to save your work. Click the Save Form button located at the top-right corner of the editor screen. This ensures all your changes are applied and preserved.
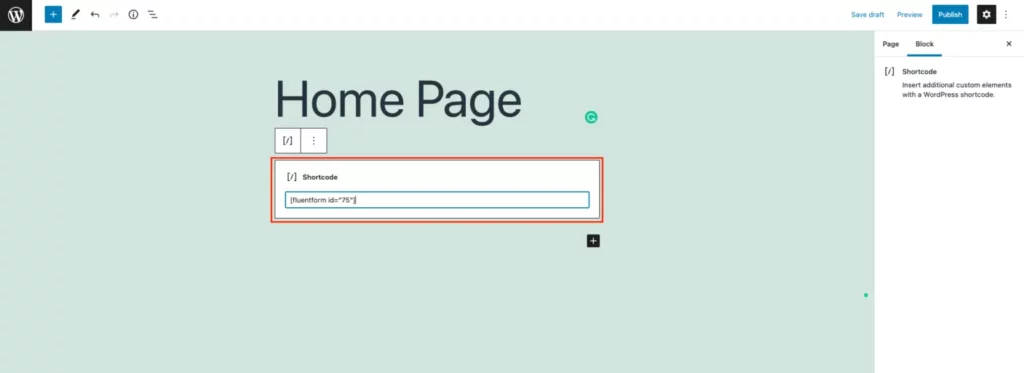
Deploying Your Form
Fluent Forms generates a shortcode for each form you create. This shortcode can be copied and pasted into any post, page, or widget area where you want the form to appear. It’s a simple yet powerful way to integrate your form exactly where it’s needed on your site.
Testing and Adjustments
After your form is live, it’s crucial to conduct tests to ensure everything works correctly. Submit a test entry to see how the form behaves in real-world conditions and to verify that the data is captured accurately in your WordPress dashboard. Based on the feedback from these tests, you may need to adjust the form fields or settings for better functionality or user experience.
Conclusion
Following these detailed steps, you’ve successfully created a custom form using Fluent Forms in WordPress. This tool’s flexibility and ease of use make it an excellent choice for anyone looking to add functional and aesthetically pleasing forms to their website. Whether collecting simple contact details or managing complex multi-page forms, Fluent Forms provides all the tools you need to do so efficiently and effectively.