Do you think installing WordPress on Bluehost is tricky? Then you are wrong as in this article I am going to show you how you can install WordPress on Bluehost Addon Domain in just few seconds without accessing cPanel or without using Softaculous software.
Using Softaculous software is one of the most easiest ways to set up a website on WordPress. Even a non-technical person also easily follow the steps and install WordPress on Bluehost. But Bluehost has come up with a very easy to follow interface with which you can even do that faster.
Let’s discover this complete Bluehost tutorial and create your first website on Bluehost in just few clicks.
Before proceeding further, I am assuming that you have already purchased Bluehost and if not then you can use this special link to activate the $2.95/mo Bluehost pricing.
Steps To Install WordPress On Bluehost Without Softaculous/cPanel.
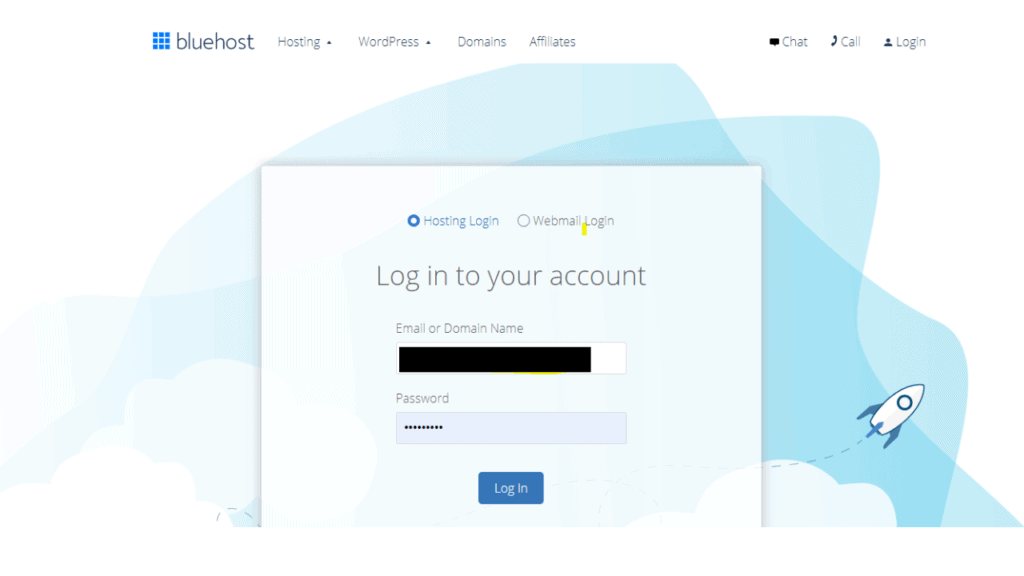
Step 1: First of all type my.bluehost.com and access the Bluehost hosting account URL. You have to provide the user & password details. If you are doing this first time, then check out the mail you received from Bluehost after finishing the transaction. You will get the Bluehost login details.
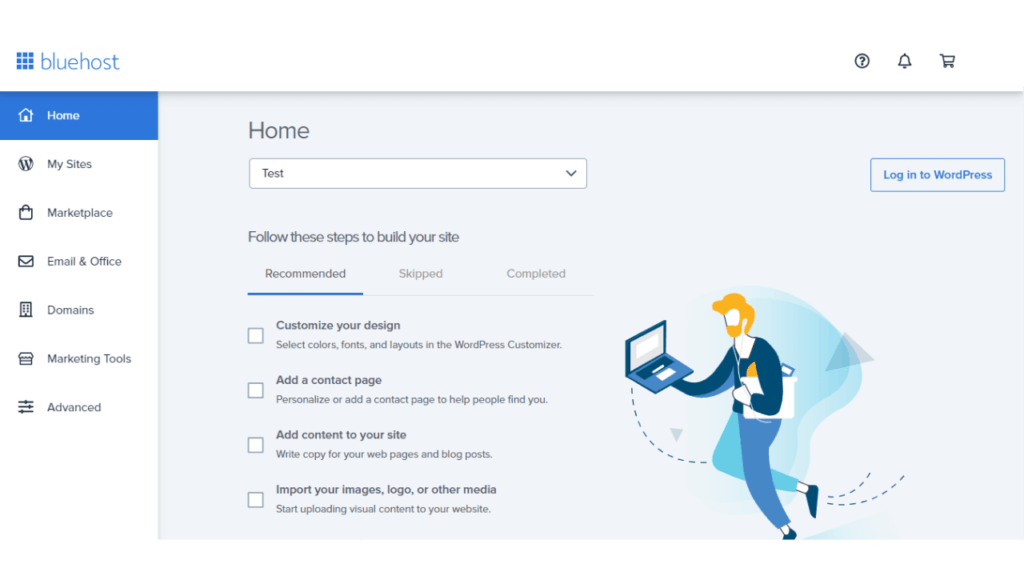
Step 2: As soon as you login, you will find a screen like below. This is the new Bluehost dashboard which is very easy to understand. It’s not like typical cPanel based interface, rather an interactive interface with which anyone can do necessary actions easily. Anyway, let’s continue with this Bluehost tutorial further.
Step 3: Now you have to Add the domain in Bluehost account as Addon Domain. You can follow the tutorial on how to add an Addon domain on Bluehost account. In case, you have purchased a free domain with Bluehost, then you don’t have to add anything extra.
Just click on the left side My Sites option and you will find a screen like below.
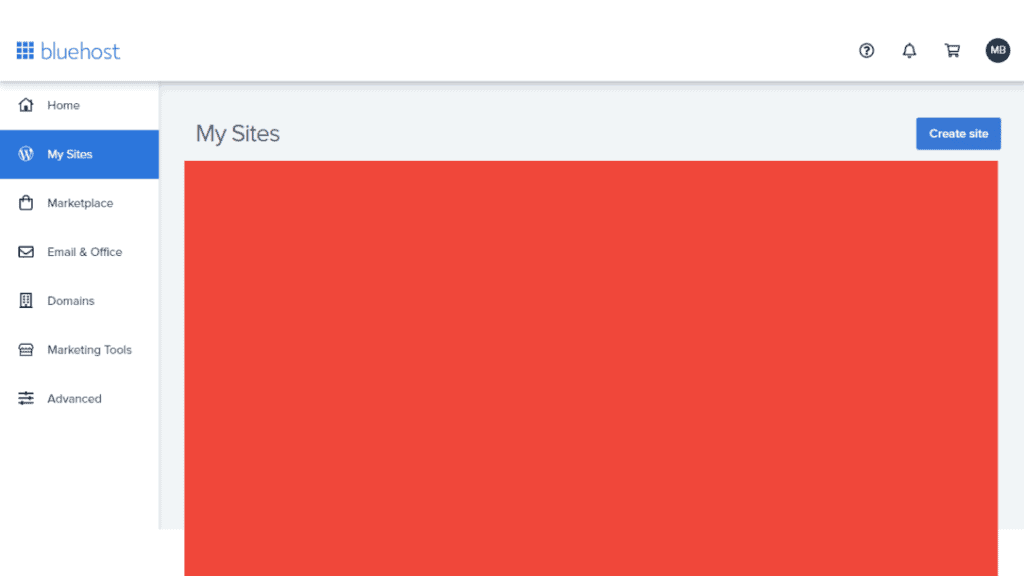
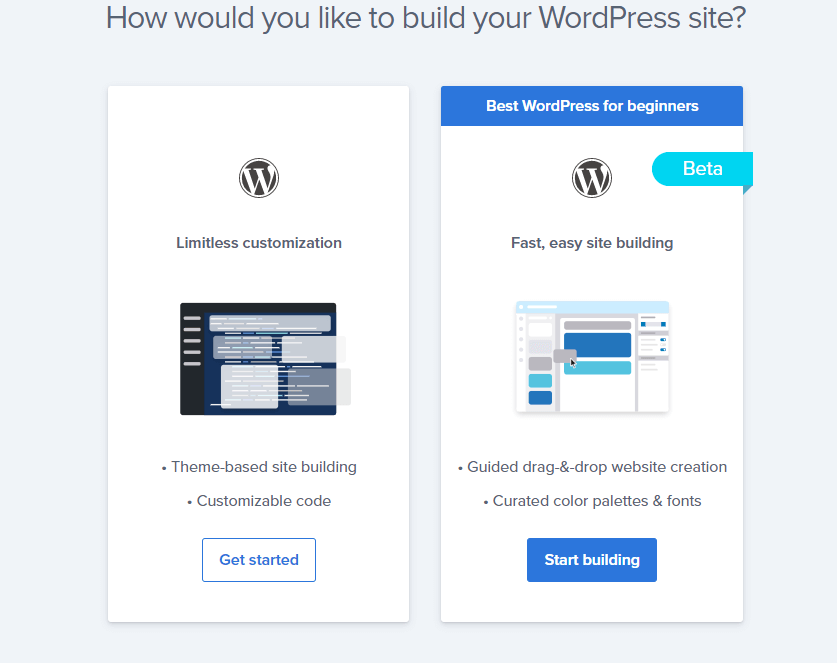
Step 4: Now click on Create Site button on the right side. It will ask you to choose whether you want to go with typical WordPress installation or you want to use Bluehost site builder.
Site Builder is nothing but a tool which will help you to create a website with some ready to use templates and designs. It’s better to start with WordPress and hence choose the left side option and click on Get Started.
It will open a screen like below where you need to provide the site name and site tagline. You can change these details later on also after installing WordPress on Bluehost. But it is better to provide something meaningful.
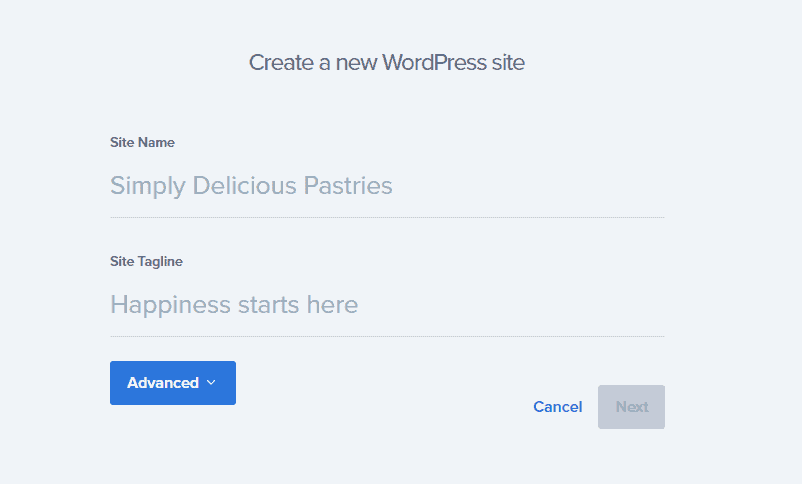
In this screen, you will find an advanced button as well. If you don’t click on this button, it will allow you to go to the next screen and consider the user & password automatically. Your user name will the Bluehost login details only.
But if you want to change them, just click on that button and you will find a screen like below. It is better to provide unique user name in case you are going to host multiple websites on that account. E.g. I am using Bluehost Choice Plus plan where I can host unlimited websites and I do recommend this plan for beginners as well. As this is the best Bluehost plan with max features and affordable pricing.
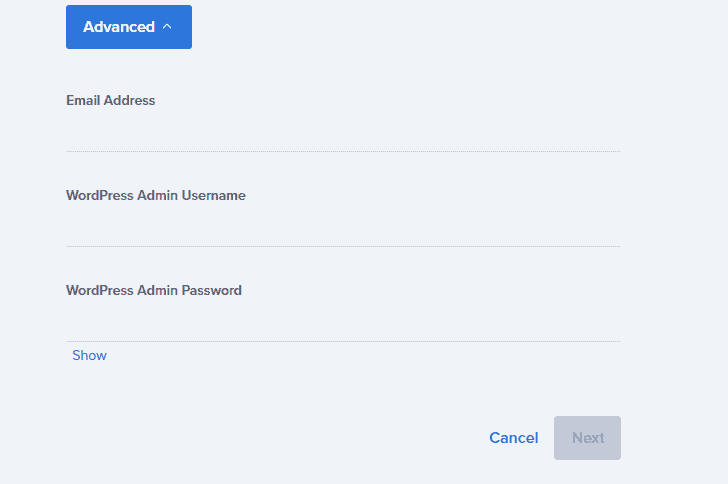
Provide all the details specific to your website and then click on NEXT button.
Step 5: Now, in this screen you have to choose the domain name where you want to install Bluehost. I found this process little odd as Bluehost should provide the option to choose domain first and then provide Site Name & Tagline.
Anyway, that’s how it is here and make sure you pick the right domain name.
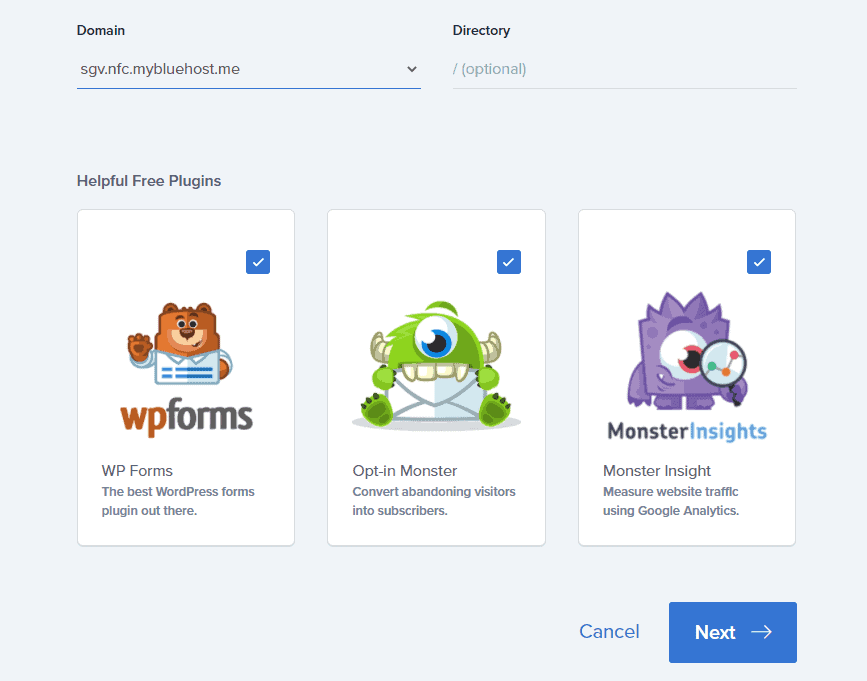
Here make sure to keep the directory field as BLANK and also untick all the plugins. You can install the plugins later on as per your need. So, better to focus on the WordPress installation now. Now click on NEXT and your WordPress installation will start.
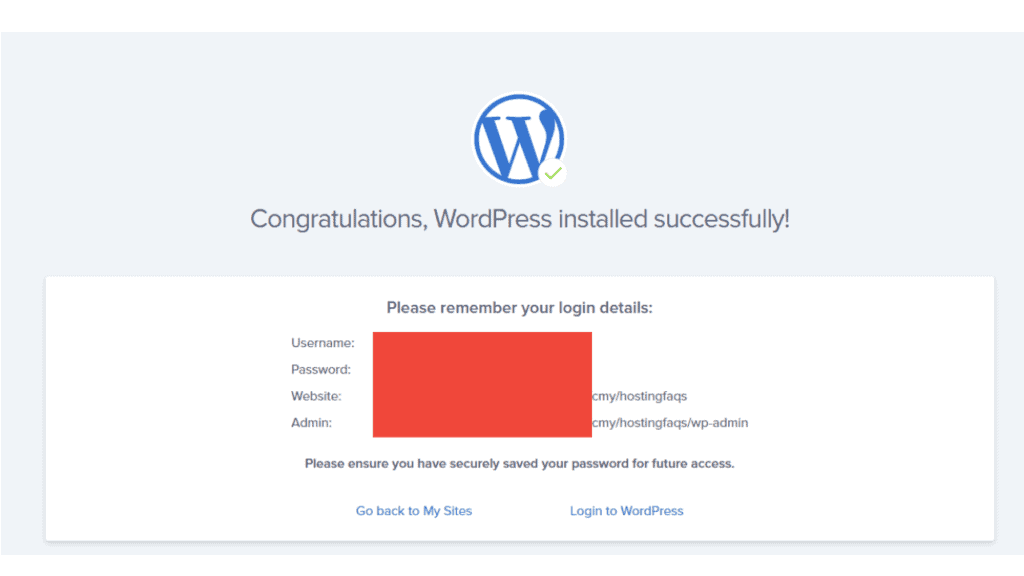
Step 6: After successful installation you will find a screen like below. You can either use the Admin URL or click the Login To WordPress option to access your website. It may take some time to set up the SSL certificate and the website. So immediately you may find the website is not loading. Sometime temporary domain name will come as well. So, don’t worry and wait for few minutes.
That’s It
So, there are various ways one can install WordPress. This is one of the easy ways and I found compared to any other hosting companies, Bluehost offers a very good interface. I will create another tutorial where I will explain how you can access Bluehost cPanel and install WordPress using Softaculous App which is very common and popular. In fact that process is common for all cPanel base hosting providers.
In case you find any issues while installing WordPress on your Bluehost Domain, you can write a comment below or you can also watch my videos on YouTube and write a comment there. I will help you to fix your problems for sure. Thank you for your support.