Not sure How To Backup Your WordPress Site without using any plugin? Then I am going to help you to understand this process. This is an exclusive tutorial for Cloudways hosting users only. Recently I have migrated this website from SiteGround to Cloudways and that’s why I am creating these tutorials to help you out.
WordPress is an amazing platform to create website in just few minutes. Yes, I will share more tutorials on WordPress so that you can easily understand WordPress and manage your own website. Before starting this WordPress backup tutorial, let’s understand why taking regular backups is a good practice for your blog.
Why You Must Backup Your WordPress Site?
So, backup means taking a copy of your entire website into a physical or any other location. A website has various types of files, folders, images, content, database etc. By taking a backup you are making sure that you are creating copy of your website in different locations only.
Taking your WordPress site backup is a very crucial task that many beginners ignore. Mostly we purchase cheap hosting plans or beginner friendly plans as beginner. In fact in many hosting plans doesn’t provide backup feature as well. In that case, if someday your website got crashed or any kind of error happened or hosting company gone through something wrong, then what will happen to your website?
These days Cyber Attacks are very common. And as a beginner, you might be doing a lot of experiments on your website in initial days. In any case, if you ended up loosing your website, how will you get back your WordPress website?
That’s why you must take a backup of your WordPress website. And in thus tutorial I will help you to take backup of your complete WordPress website on Cloudways Hosting.
How to Back up WordPress Websites in Cloudways (A Step-by-Step Guide)
First of all Cloudways provide Backup & Restore feature in their account. And their cheapest plan has 25 GB of disk space. I am using their $10/mo Digital Ocean server with 1 GB RAM, 25 GB disk space. If you want to move to Cloudways then you can also use this link and apply Cloudways Coupon: BLOGGINGJOY to get 10% discount on next 3 months hosting bill.
Anyway, let me share the steps so that you can tale a backup of your CLoudways WordPress site and also restore the same if required in future.
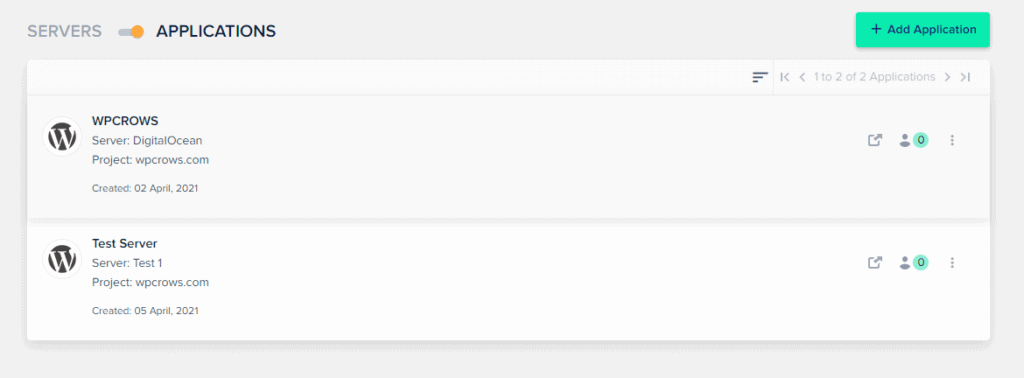
Step 1: First of all login to your Cloudways account and click on Applications. In case you have created multiple applications, then choose the one where you want to set up the backup feature. Remember, it’s good to host less domains on a server so that your website can enjoy the best performance & resources. If you have multiple websites with low traffic then it should not be a problem.
Step 2: Inside that application, check the left side menu options. You will find Backup & Restore option. Just click on the same.
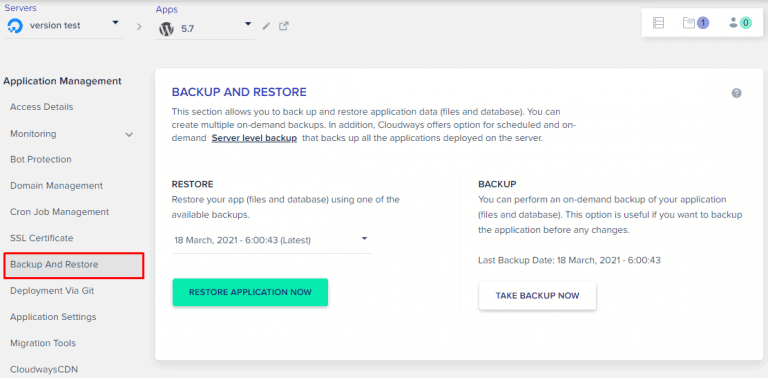
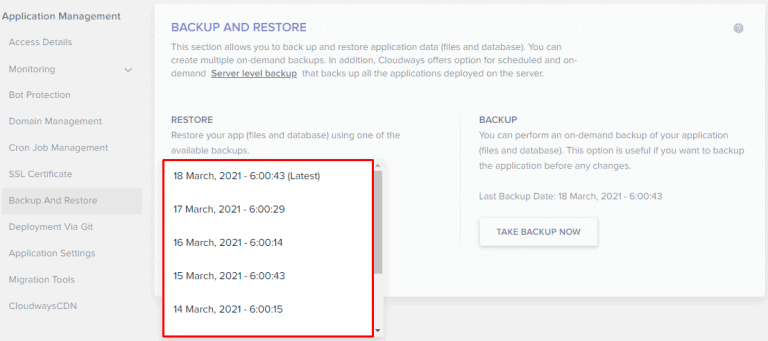
Step 3: Now in this section, you can easily take backup of your WordPress website completely. And in case you need to restore, you can use the restore feature as well. You can notice the button “TAKE BACK Up Now” for taking instant backup.
By default your website will be backed up by Cloudways automatically. If you want to change that settings then you need to follow the below settings.
Open your server and go to the Cloudways server management panel and there, you have all the server management options such as Master Credentials, Monitoring, Manage Services, Setting and Packages, Security, Vertical Scaling, Backups, and SMTP.
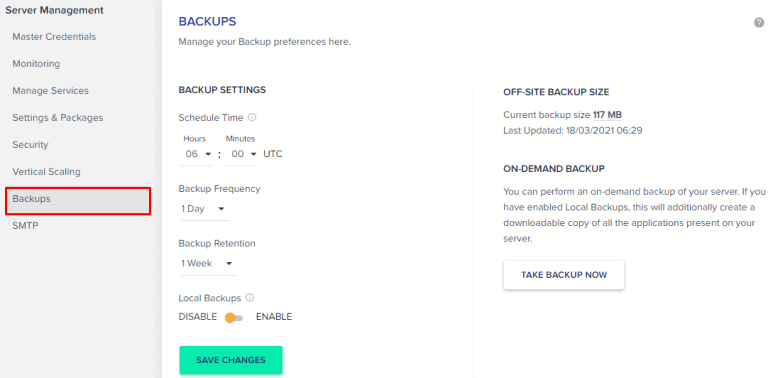
Step 4: Now on that screen you can do a lot of settings to set up your Backup preferences. Key things to remember here is that, schedule the backup time when your website is getting less traffic or you can say during an off time. It can be a weekly backup or daily as per how frequently you post articles on your blog. Make sure to check other settings as well and do the settings.
The last option is setting up a local backup. I am going to create a separate tutorial on how to take local backup of your WordPress website, besides hosting backup.
Step 5: Now let’s talk about restore settings. Now in case you need to restore your websites on a previous date due to any reason you have to use the below screen and clock on the RESTORE button. You will find various dates on which backups are available. Just choose the one and click on restore website.
That’s it. It is quite simple to take backup of your WordPress site on Cloudways and also restore in case your need it. Just review the existing settings once and leave that. You must take every precautions to protect your website and go for a peaceful sleep daily. I will also share the tutorial about local backups and why you must take the same as well in my next Cloudways tutorial. So keep following my blog.