Taking backup of your WordPress site very much necessary. But how to take backup of WordPress site files & database for free using an plugin? In this detailed tutorial, I am going to share about that only.
You can take backup of your website in various ways. Let me share few of the ways that mostly follow or you can say possible ways to back any website.
- Backup A WordPress website using UpdraftPlus Plugin
- How to backup WordPress site without plugin (Mostly using web hosting cPanel account)
- How to backup your website locally or on your computer folder (Using FTP)
In this tutorial, I am going to show you how to use UpdraftPlus Free Plugin and take complete backup of a WordPress website in just few minutes. Not only that, you can use this amazing plugin to migrate any website from one host to other hosting using the Backup & Restore feature.
Table of Contents
What Is UpdraftPlus Plugin?
UpdraftPlus is a free WordPress backup plugin. It has a premium version as well where you will get various additional benefits. But to start a beginner, UpdraftPlus free plugin is more than enough to take regular backups & transfer your website to different hosts.
You can watch this video where I have used this plugin and moved a website from SiteGround To Bluehost.
UpdraftPlus is extremely quick and easy to set up. It works by backing up your website directly into the cloud, to a solution of your choice. These include…
- Dropbox
- Google Drive
- Amazon S3
- RackSpace Cloud
- DreamObjects
- OpenStack Swift
- Updraft Vault
Just install this plugin and follow this tutorial so that you can schedule automatic backups, backup files, databases, plugins and themes, and restore your backups directly from your WordPress control panel.
How To Backup A WordPress Site & Database For Free Using UpdraftPlus Plugin
Here I will be guiding you to a detailed tutorial to understand and implement the process. Let’s start this step by step guide.
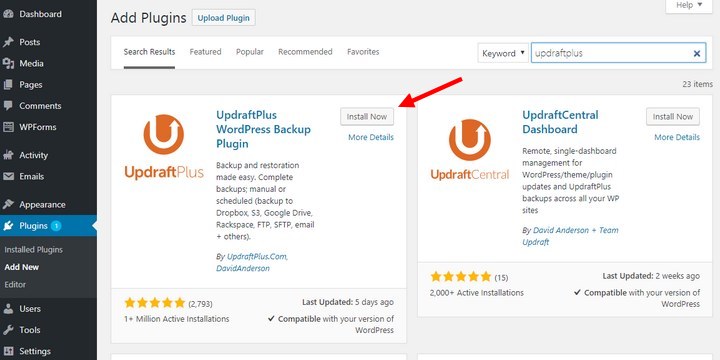
Step 1: Installing UpdraftPlus
You have to install UpdraftPlus plugin first. It’s very simple. Go to your WordPress dashboard => Plugins => Install New Plugin. Then type UpdraftPlus into the Search Bar. Select the UpdraftPlus WordPress Backup Plugin and click Install Now > Activate.
Step 2: UpdraftPlus Settings
To set up UpdraftPlus, select Settings > UpdraftPlus Backups from your WordPress menu. This will open the UpdraftPlus Backup/Restore page, which will look like a screen like below.
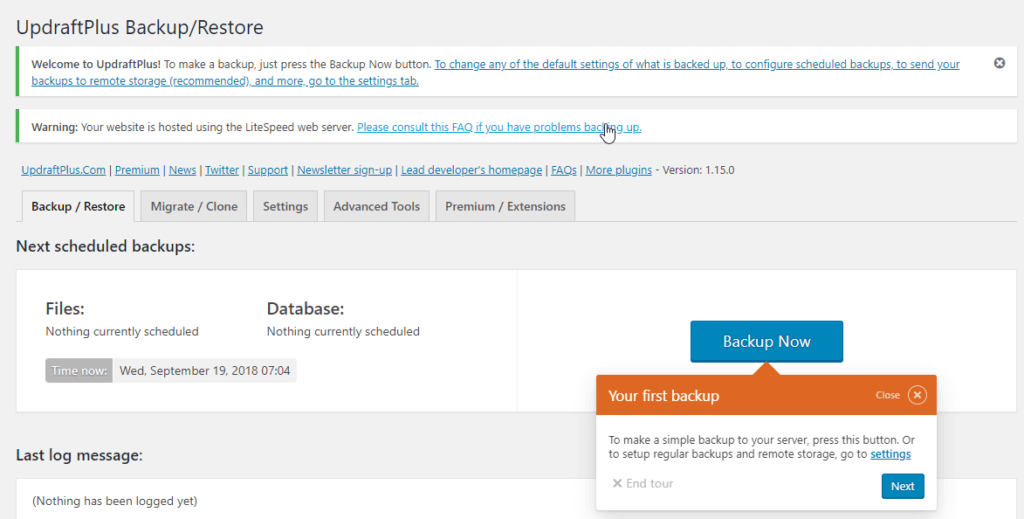
How To Take Manual Backup Of Your WordPress Site
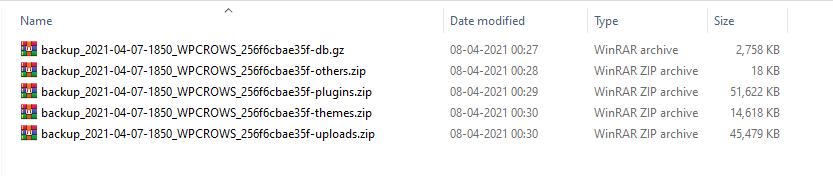
You can create a manual backup by clicking on this Backup Now button. It will create 5 files like below that you need to download to your computer or laptop.

You can also find a restore button there, that we will use in case you want to restore your website on a previous dates, in case any website error. Other than that, you can also setup a automatic backup so that your website can be backed up as per a schedule time on a particular location.
How to schedule Automatic Backup Using UpdraftPlus
To set up scheduled backups, select the Settings tab on the UpdraftPlus Backup/Restore page. There you will find separate options for files & database. In each UpdraftPlus settings, you will see the update frequency settings like below.
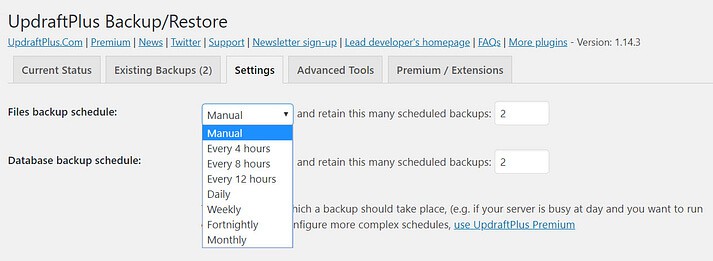
Now from this list, you can choose how exactly you want to take backup of your website. If your website is updating frequently, e,g, a news website then you may go for hourly backup. But in case you publish 3-4 contents in a week then you can go for weekly or in few days also.
- Every 4, 8 or 12 hours
- Daily
- Weekly, fortnightly, or monthly
Next you have to choose the location where you want to save / store your backup files & database. Now, here as an UpdraftPlus free user you will get some limitation. But still I think for a single website owner this is enough. Just choose Google drive and let’s save our backup files & database there only.
Just follow the exact UpdraftPlus settings as per the screen below. In your Google Drive account, you will find a folder with name UpdraftPlus. That you can’t change with a free account.
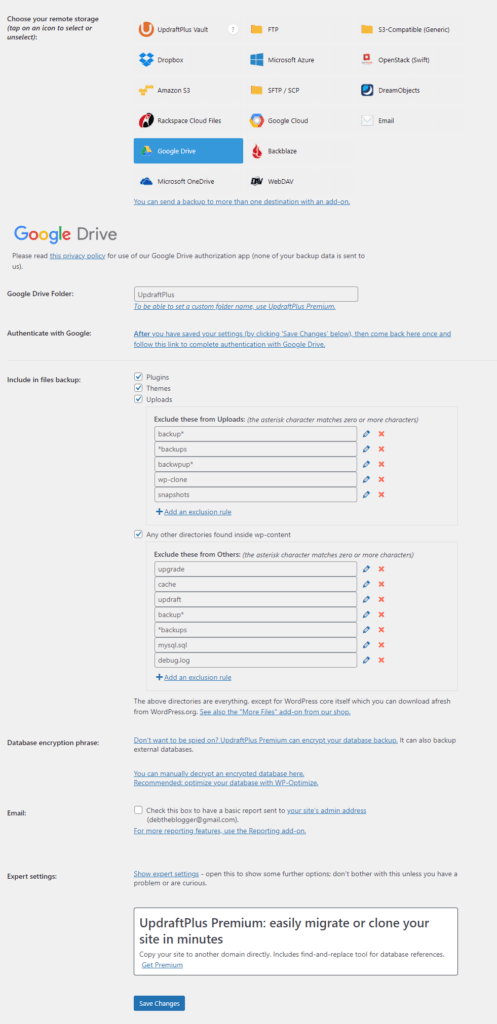
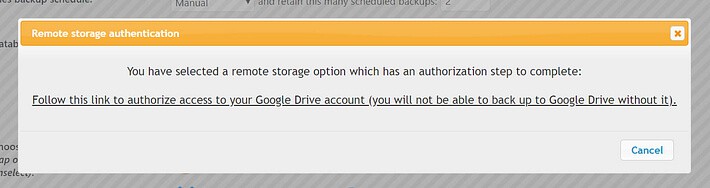
After that click on the SAVE CHANGES button and it will do the configuration and finish automatically. It may ask your email ID to validate, then do it by selecting the right email address. After that you will see a screen like below popup.
All backups will now be stored directly in your Google Drive. In case you want more features from UpdraftPlus, then look for their premium plans.
Step 3: How To Restore backups Using UpdraftPlus Plugin
So, in case you need to restore any backup then you need to check the existing backups. They will be listed on the UpdraftPlus dashboard area like below.
To restore a backup, click Restore. You can also manually upload files by clicking the Upload backup files from your laptop or computer. If you have downloaded them previously they will be looking like below.
Next, you will be asked to select which components you would like to restore. These consist of…
- Plugins
- Themes
- Uploads
- Others
- Database
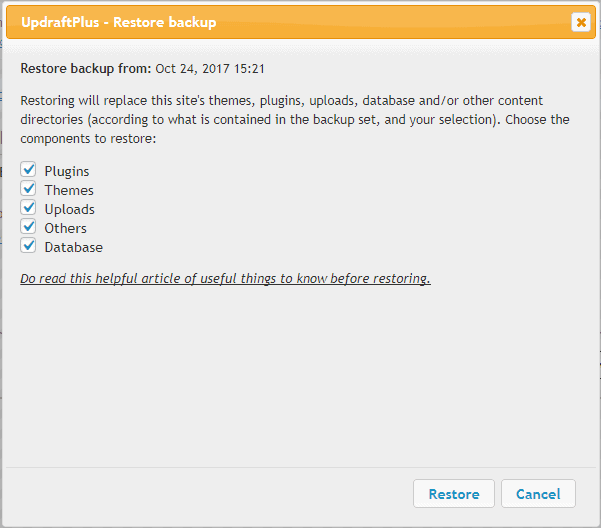
Just click on RESTORE button and it will start automatically. As soon as your restoration process in complete, you will find a screen like below.
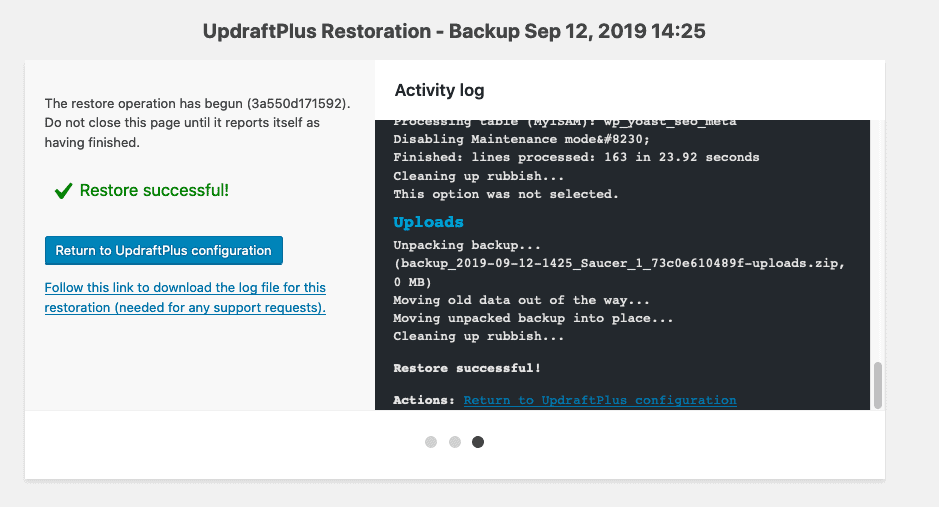
Then you can click on the return to UpdraftPlus configuration screen and the entire process of taking a backup of your WordPress site will be complete.
Conclusion
So, do you find this tutorial useful? Do you prefer any other plugins to backup a WordPress site for free? Feel free to write a comment below and share about that. If you have any question also regarding the process, please write a comment below.